Digital Marketing clients will often request that a chamber of commerce logo and link be posted to their website. The client signs up to their local Chamber of Commerce, and the Chamber organization emails the client HTML code to post on the client’s website footer. This all seems harmless, and the client may believe that it will increase their website’s visibility and conversion potential. But there is often a hidden problem with this scenario that can produce a negative outcome in regards to the client’s website.
Unfortunately, Chamber of Commerce and other similar business networking organizations often lack knowledge of website development best practices and optimization techniques. For a specific example, the local Chamber of Commerce emailed one of my clients the logo code with a broken ‘src’ attribute that was missing the required quotations:

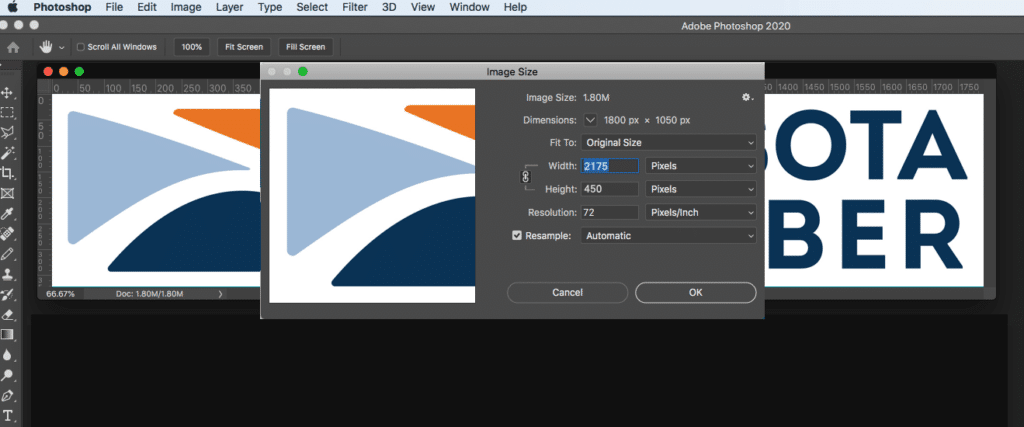
Fortunately, WordPress website content editor will usually auto-correct this error. But the bigger issue is that the image the Chamber is linking to is 10 times the size that it should be; 2175 pixels width by 450 pixels height. When displayed in the website footer, this image will usually be around 200 pixels, so there is a waste of 1975 pixels. Also, linking out the a 3rd party website to get the image creates an unnecessary load on the website, as well as introducing an additional ‘external origin’ which Google may not like. And about Google, posting this code on the client’s website will create an error in Google’s Core Web Vitals, which Google now uses to rank websites on the search results pages.
So how do we solve this problem? Easy, download the image, resize it to 200px or whatever the final display size is. Then save the image as a PNG8 indexed image. Upload the new image to the client’s website and post it to the website footer.
Resize the image
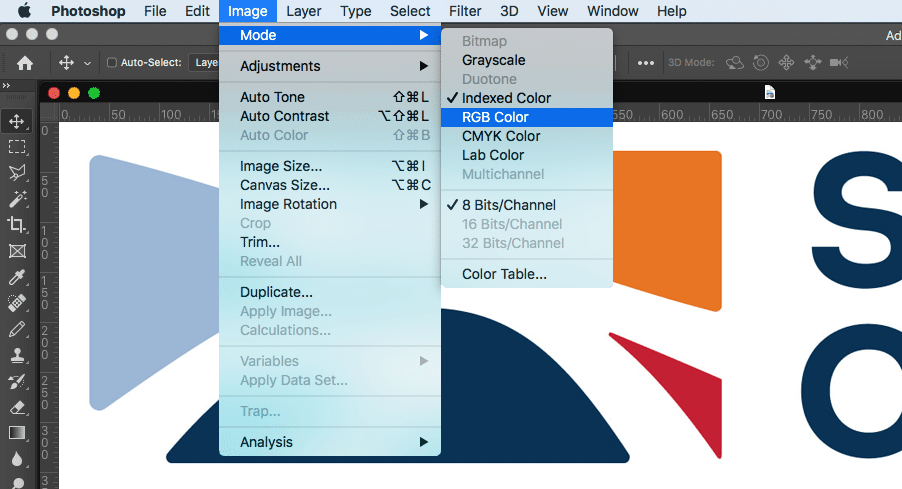
Before resizing the image, check to see if it is an Indexed PNG. This is the final web optimized image format you will want to use. However, resizing an Indexed PNG will introduce unsightly artifacts and pixelization in the image. To avoid this, change the Image Mode from Indexed to RGB:
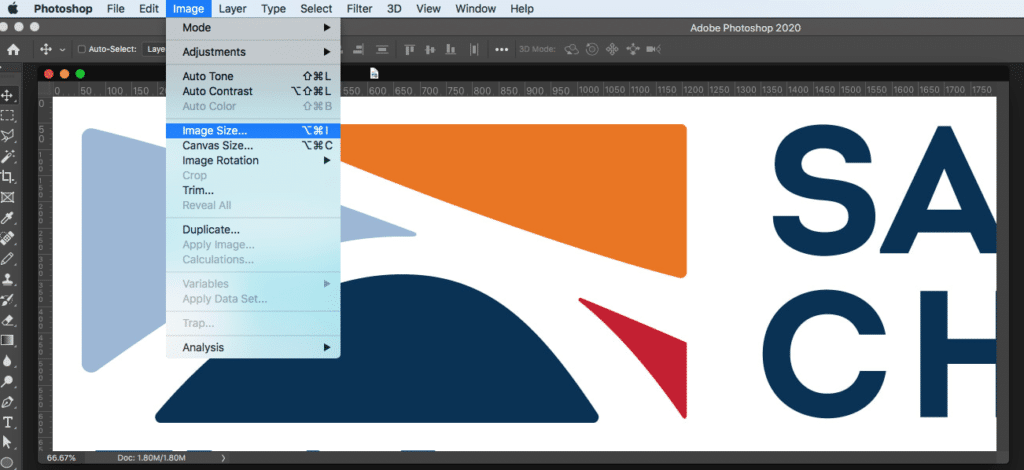
In Photoshop, navigate to Image > Image Size:
In the Image Size dialogue, change the width to 200px or whatever your final display width is:
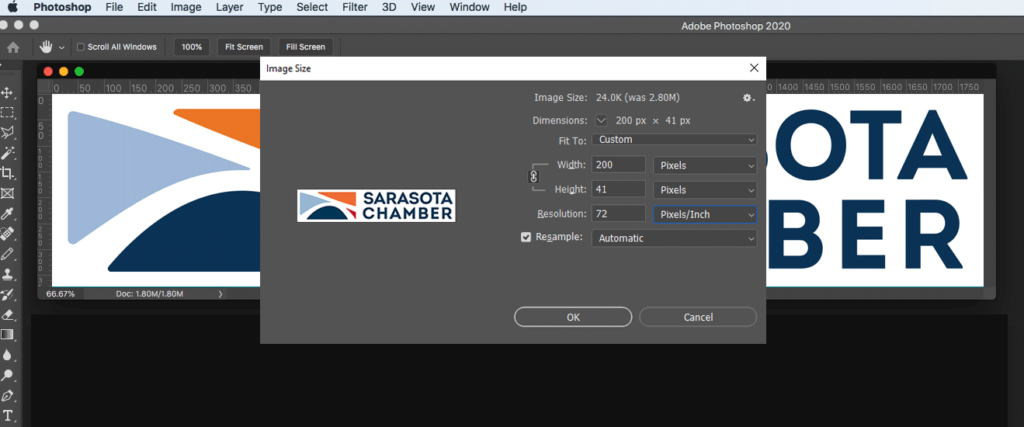
You’ll see that the file size is also dramatically reduced:
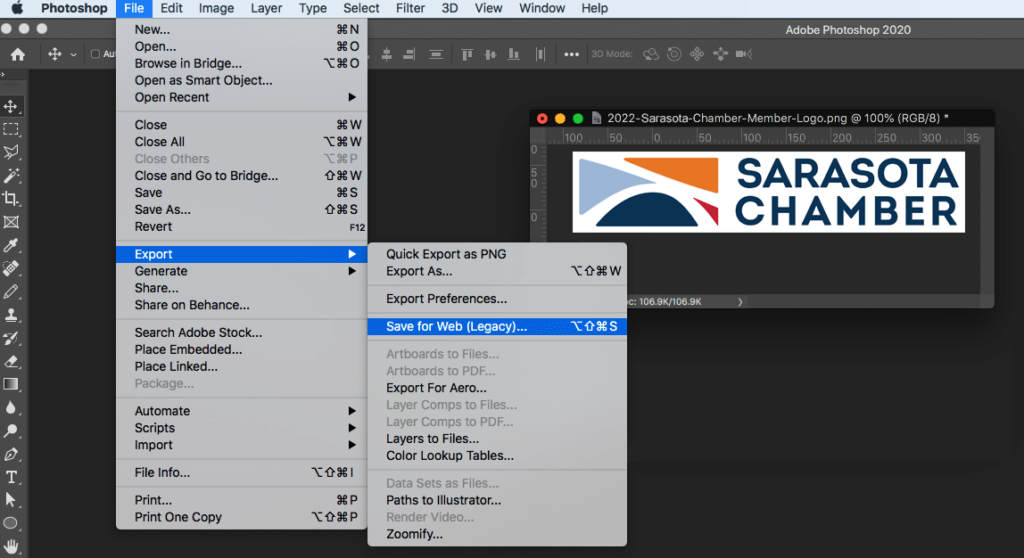
Now with the image resized, export the image file using Save for Web:
In the Save for Web dialogue, select PNG8 as the image format with Adaptive color sampling option:
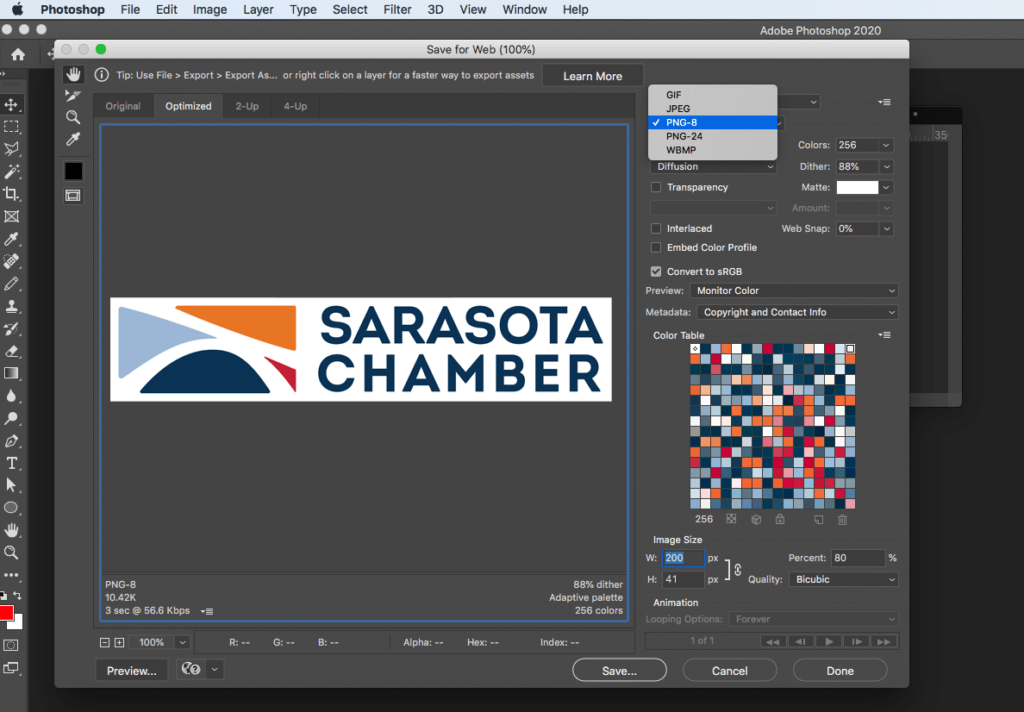
Save your file, upload it to your website, then change fix the code snippet errors and change the image reference to your locally hosted image instead of the external source:

Now the Chamber logo will display on your website at the appropriate size.
An additional note. When linking to external websites, include the ‘rel’ attributes of “noopener noreferrer”. This is a security protocol and can help prevent phishing schemes and malicous actors that may try to take advantage of the ‘window.opener.location’ object that results from a target=”_blank” link.
